Pages

Tuesday, 16 June 2015

Snail Mail Out Going

I sent this a little while ago now but I thought I would still share it here, better late than never!
Recently I sent off another parcel to my pen pal Sara
 I had been wanting to make a felt envelope for so long and I finally found the time to do it. I loved making it and it is a fun way to keep some letters.
I also added in a blue felt tea cup because I knew that my pen pal Sara would like one. I have been thinking that this would look really cute in traditional Christmas colours of red and white so hopefully I can get around to making some for gifts.

  I added in some paperclips I recently found, some washi tape, a handmade stamp and of course the teacup and my letter.

I added some washi tape to the front and back of the package and popped everything inside and sent it all off.

Tuesday, 9 June 2015

Mamie Made Stamps

I've recently been making my own little stamps, of course I was inspired by some lovely pictures on pinterest of beautifully carved stamps.
 I have done some lino cutting courses so I thought I would get out my old tools and give it a go.
When I went to find them of course I couldn't, so I bought some new ones. They are relatively cheap I think these three cost about $16 (find them here)and the rubber to make the stamps were $18(find that here) for an A4 piece or about $8 for a 10x10cm piece.  
 The only other things you'll need if you'd like to try our making your own stamps are a ruler, a stanley knife, a pen, a cutting mat (or a chopping board) and some stamping ink, which you can pick up cheaply at a news agent. If you have ever done any lino cutting you will find this much easier, the rubber is not as firm as lino so it is very easy to carve.
I've had fun carving tea cups, houses, envelopes and even some words but just remember if you carve words that you will need to carve them backwards so that they stamp the right way.
I am hoping to make lots more fun stamps to use for snail mail and cards.
Here is some from Pinterest that inspired me!

Tuesday, 2 June 2015

Pictures from May

This May...
 There were presents wrapped
 There was chrysanthemums enjoyed
 There was some with tea.
 There was some reading of this lovely snail mail book by Michelle Mackintosh.
 There was a m and m covered birthday cake for my hubby.
 There was a game of mouse trap
 There was some sailing.
 There was some yummy food
And there was tea, always tea. 
It was especially nice in a pink sweetheart cup.

Wednesday, 20 May 2015

The Evolution of Stars

I did happen to get super behind with my 180 ornaments I feel like it was mostly because I got stuck on March's stars.
I had really wanted to add in another colour but nothing really seemed to work or feel just right.
 I finally ended up making these plain stars and for now I am happy with them.
 I am still catching up with April's ornaments, I am nearly there with three to go. 
 Then I will be able to get a good go at getting Mays ornaments done before June arrives, although the months feel like they are whizzing by!

Monday, 27 April 2015

Mamie + Blake Made: A Heat Pack!

I have  a handmade little heat pillow that I love to heat up and pop on my feet when I am crafting or watching a little TV. Its lovely but I have a problem, my little guy Blake is a cheeky little thief and loves to take it and use it for himself!
 So yesterday on our morning walk I noticed his jeans were about two inches too short (how do they grow so fast!!?) and we were having a discussion about recycling so we put two and two together and came home, grabbed some of his too short old jeans and made a heat pack for him.
 He is absolutely dying for me to make one for Luke too. If I don't make one today I think I will be in big trouble! He cut all the letters, then I sewed them on, sewed it together,  he added rice and I sewed it shut. Simple.
It is going with him everywhere at the moment! Hes been carrying it around on his head and even taking it in the car with us!

Saturday, 25 April 2015

Snail Mail Outgoing!

Don't get me  wrong I absolutely love my boys, I love that they are adventurous, funny, cheeky I love that they just wanna be like there daddy, I love that they play together and love together and I love that I am the princess of the house since I am the only girl here. But many days lately, now that my boys are getting older and are able to do more fun adventurous things (and probably because they don't need me so much now) I wish that there was another girl in the house.
 So to help myself get a little girl fix I thought it would be cool to send a little snail mail to my nieces who are four and six. You know because its always exciting to get something in the mail. My boys LOVE getting things in the mail.
 So I found some stickers and Barbie chocolate coins the other day and they became the starting point for some girly snail mail. I popped the chocolate in the coral striped bags and stapled a Kaiser Craft project Life card on the front.
 I also made a little paper book with their names on that they can write or draw in. And I made some cards with some project life cards and wrote a little note in there.
This was such fun to put together and I am hoping that they like it, if they do I think there must be more snail mail girly adventures. It makes my heart happy to make fun cute girly things!

Friday, 24 April 2015

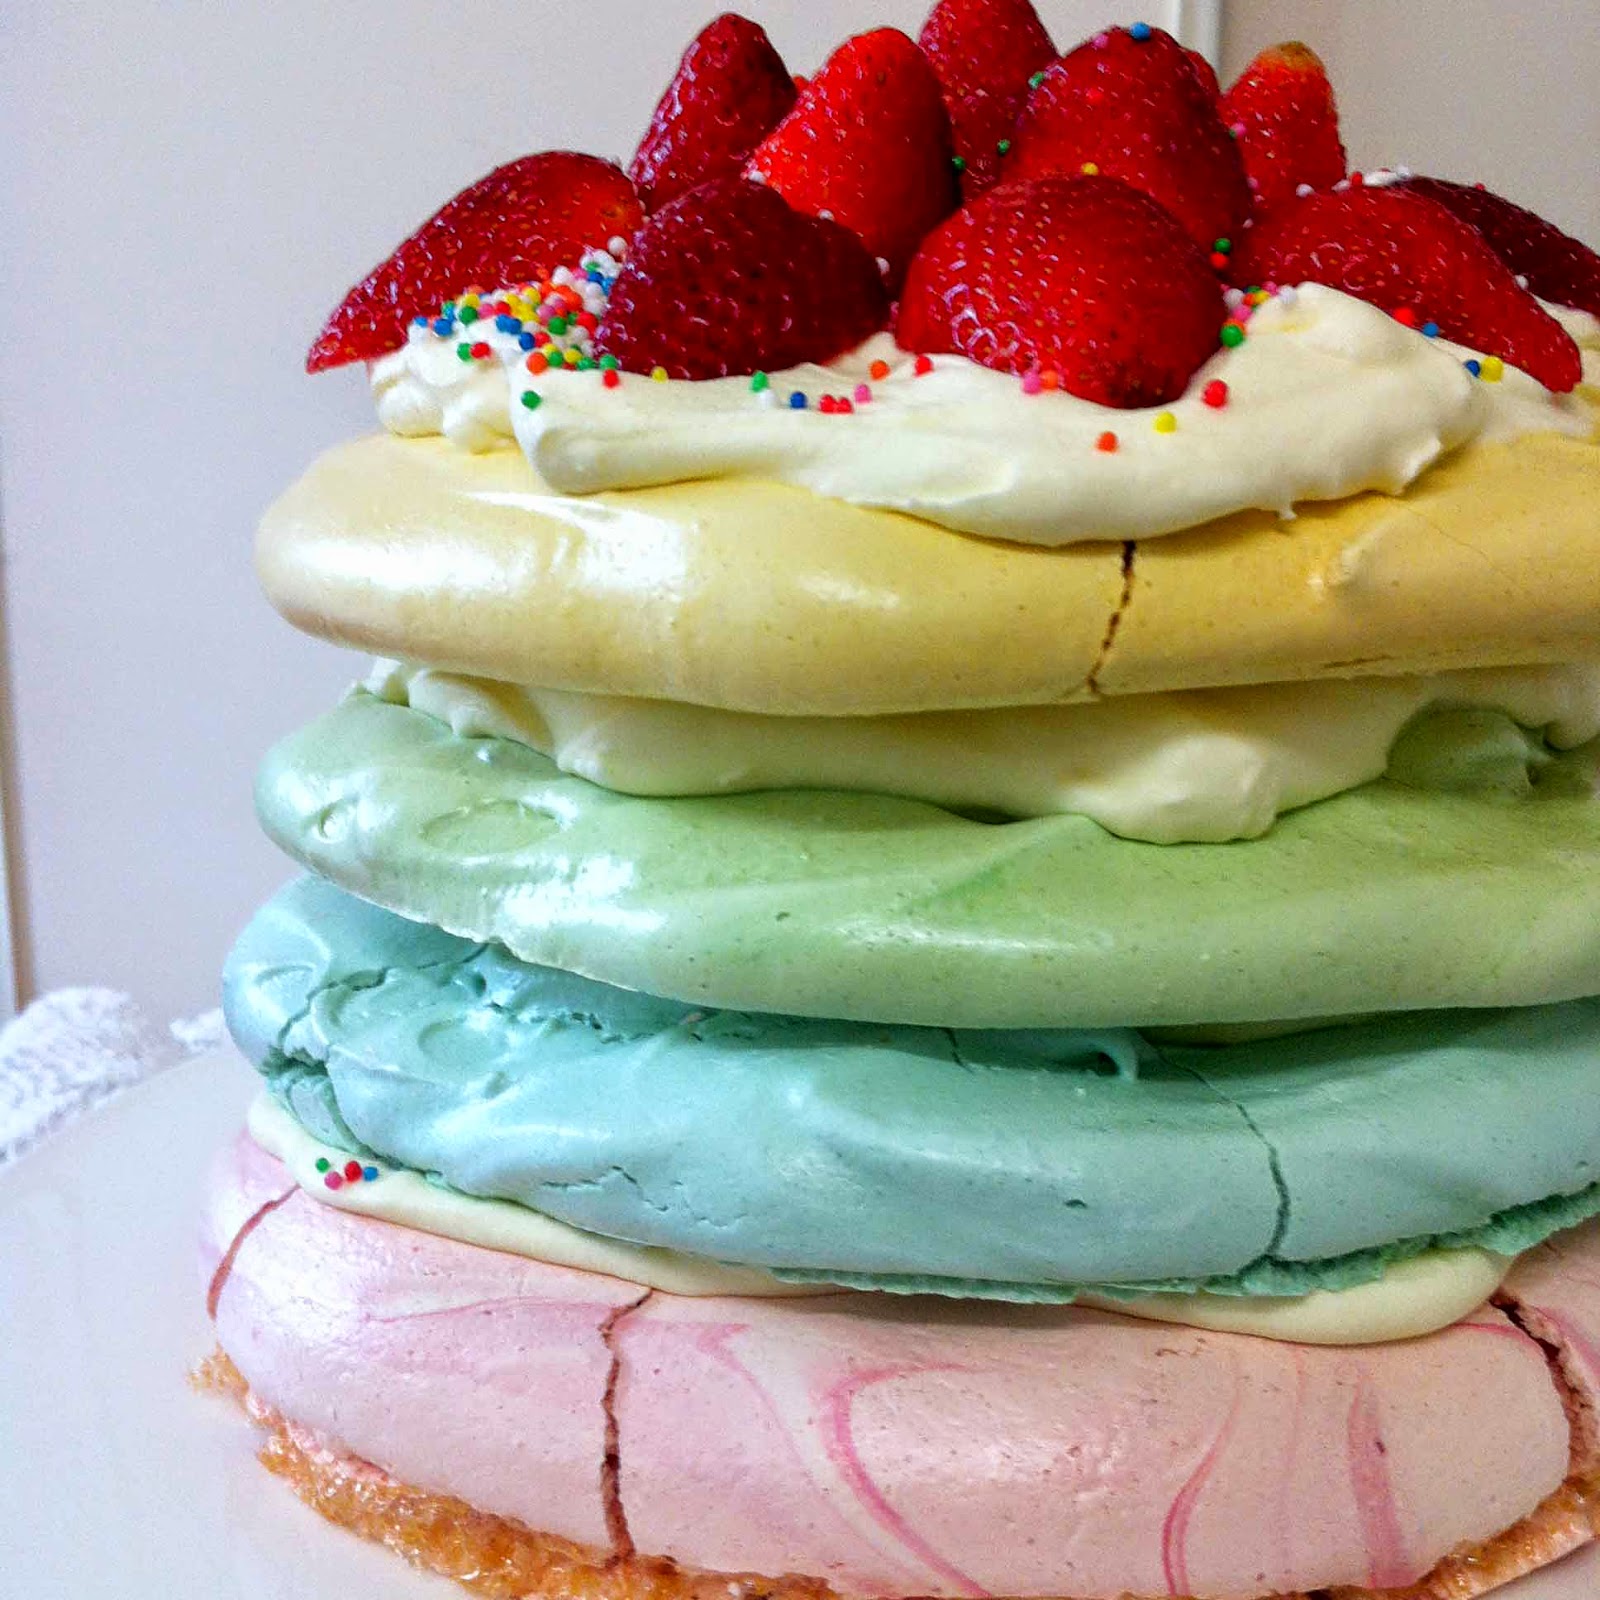
Rainbow Pavlova

I found a recipe in the latest issue of recipes+ right before Easter for this fabulous Rainbow Pavlova Cake and even though I am not the biggest fan of pavlova I just couldn't stop thinking about this recipe and just had to make it for Easter. 
I've never made a pavlova before, yup this was my first attempt! I was pretty happy with it! I didn't have most of the extra ingredients but I just went with it and it was fine. 
 It turned out being about 20 cm in diameter or about the size of a normal cake but a bit higher.
So here is the recipe:

8 egg whites
2 cups of caster sugar
blue, green, yellow and red food colouring
600 ml of thickened cream
1 tsp of Vanilla essence
Strawberries or any fruit that you like to decorate.

Also you can add 1 tbs of cornflour and 2 tsp of white vinegar to the pavlova mixture. I didn't have it on hand so I didn't add it. i believe it helps to stabilize the mixture.
And the recipe calls for food colouring gels but I only had liquid and it was fine.


Preheat the oven to 120c/100c fan forced. 
Line four baking trays and mark  four 20cm circles with a pencil around a plate.
Using an Electric mixer beat the egg whites in a clean dry bowl adding the sugar slowly until its dissolved and the eggs have firm peaks.
Divide mixture into 4 portions and one colour to each potion, spread out onto 20cm circles.
Bake for 1 1/2 hours until dry to touch.
You may need to swap trays around during baking time to keep everything even.
Let pavlovas cool before assembling.
Beat cream with vanilla.
Assemble the pavlova by adding cream in between layers then decorate the top with strawberries and sprinkles.
Then Eat!